
Overview
We all know creating and managing SSL certificates could be pain and when it comes to cloud computing things could become more complex. AWS provides a solution called AWS Certificate Manager or ACM for short. AWS Certificate Manager is a service that lets you easily provision, manage, and deploy public and private Secure Sockets Layer/Transport Layer Security (SSL/TLS) certificates for use with AWS services and your internal connected resources.
There are 2 types of certificates ACM provides as follows
- Public – Free to provision public or private SSL certificates to use with ACM-integrated services, such as Elastic Load Balancing and API Gateway. You pay for the AWS resources only.
- Private – For private you pay a fee
In addition to that, you can also do Certificate Authority Operations with ACM, to learn more about ACM and the pricing check this link at https://aws.amazon.com/certificate-manager
Example
In this post, we will go through the steps to generate public SSL certificate for our custom domain www.datanextapps.com and later attached that certificate to our Elastic Load balancer and without configuring SSL on our web server (Nginx on EC2) we can still communicate via SSL with valid certificates.
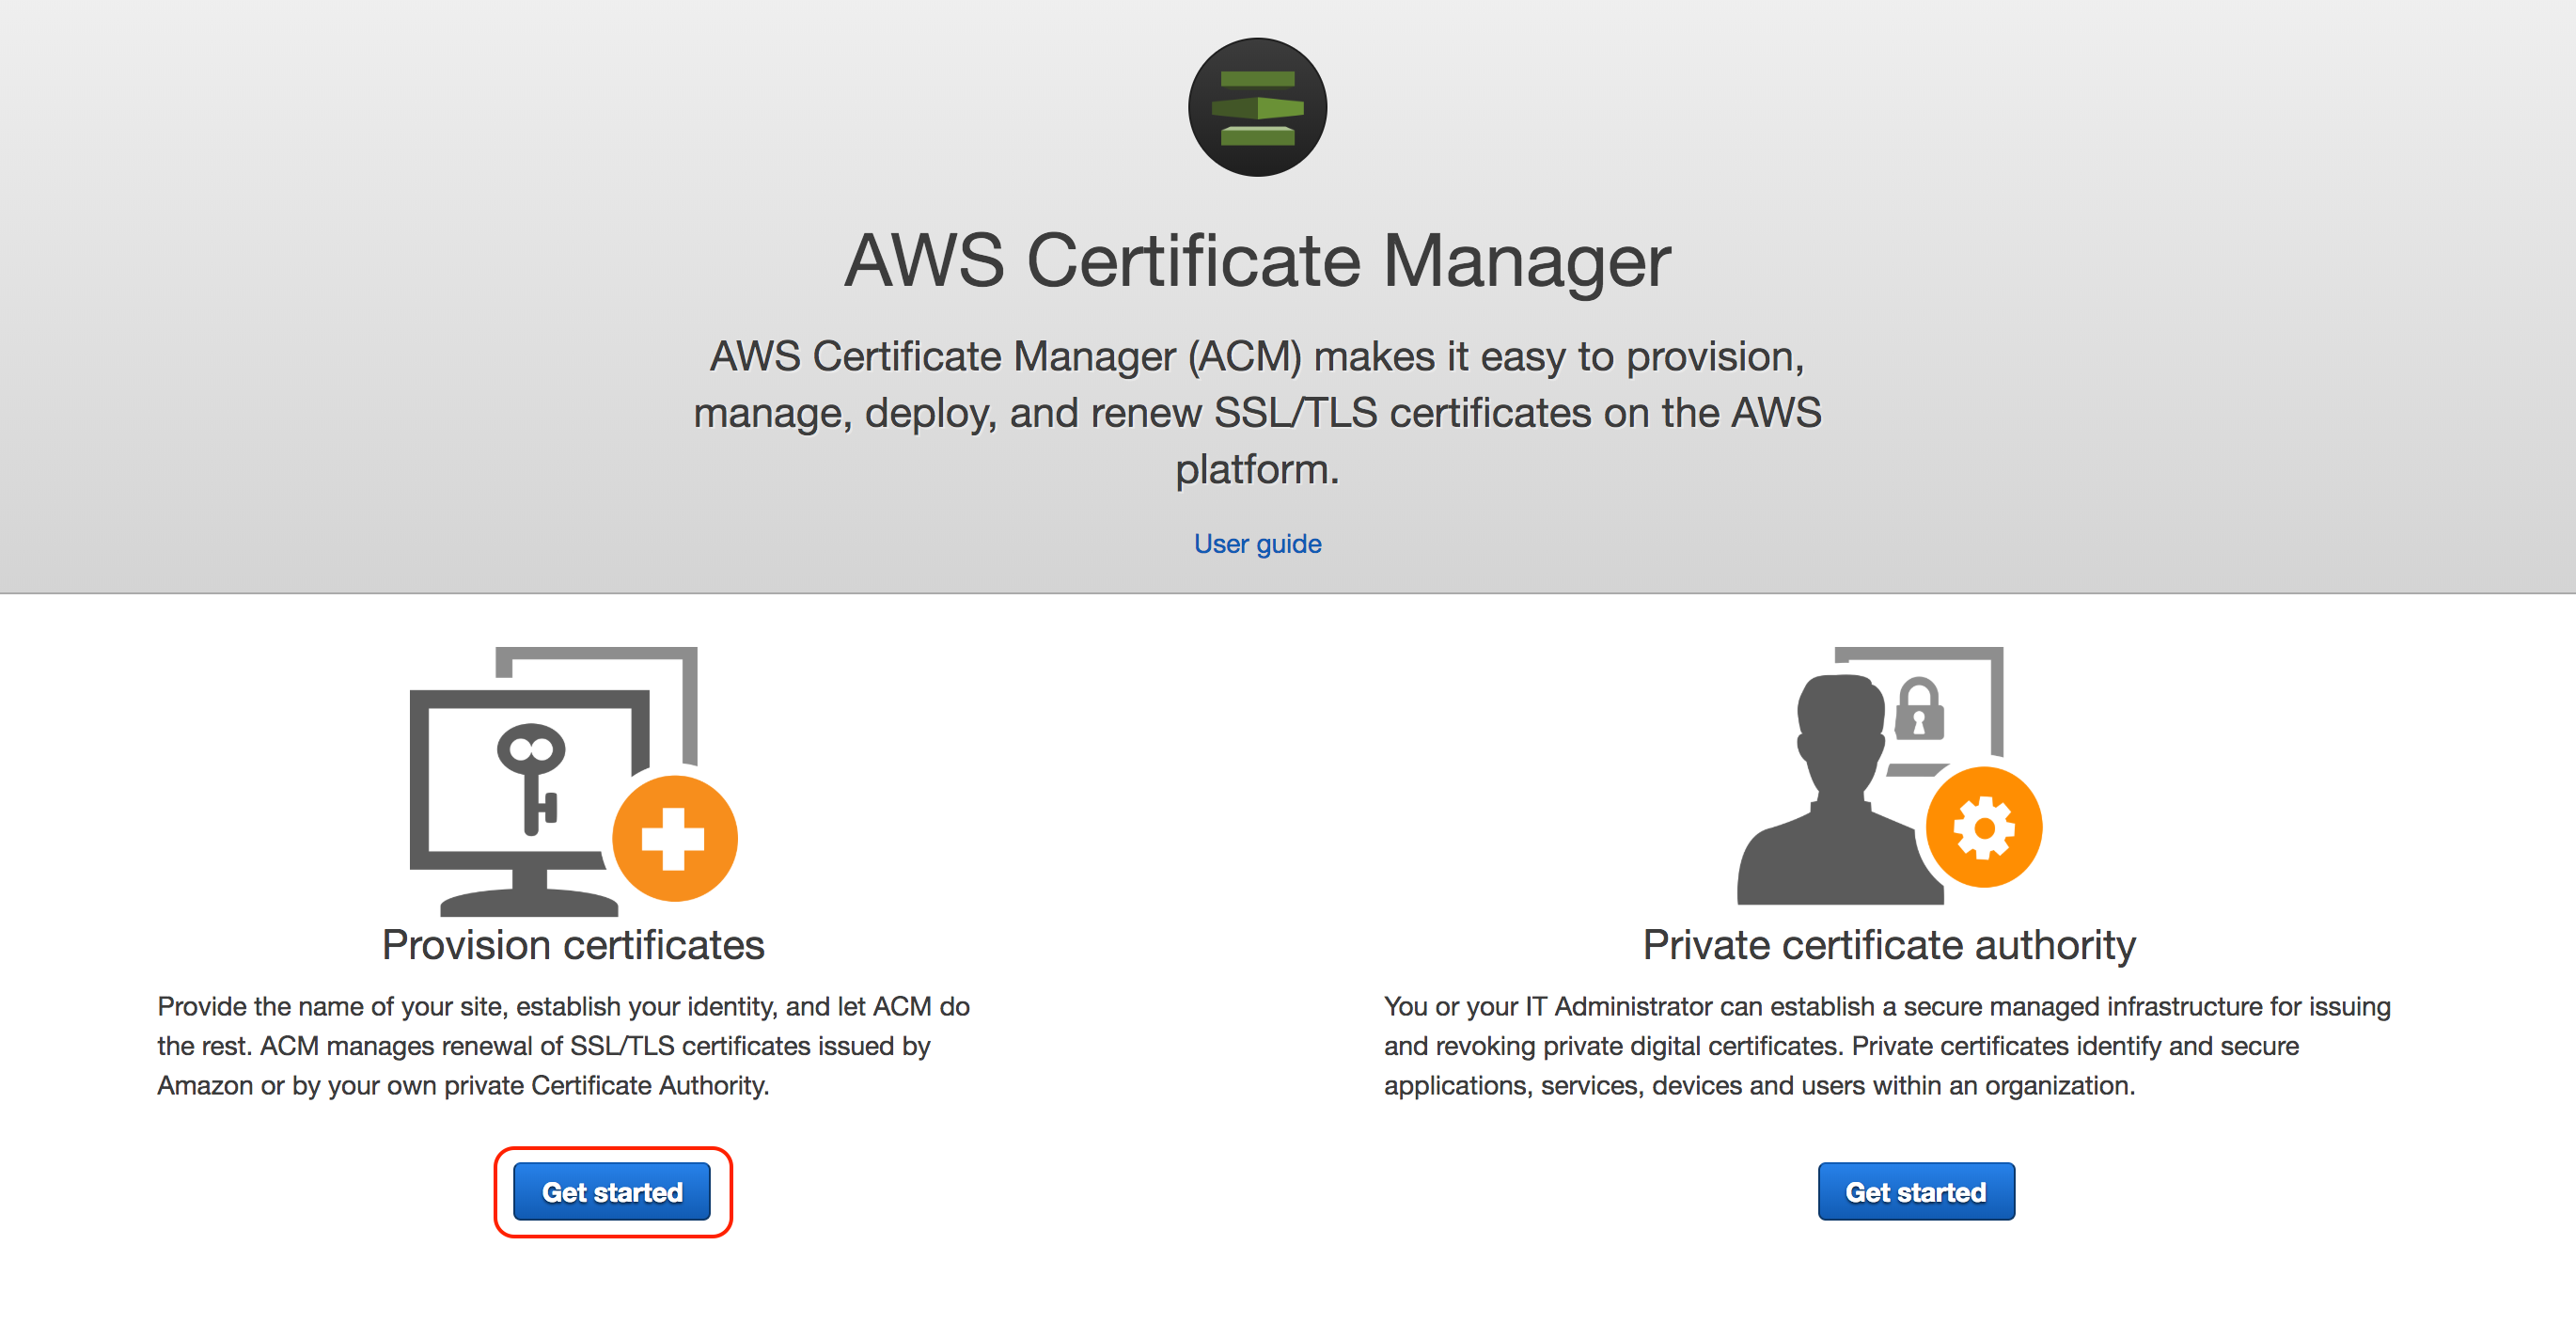
Provisioning Certificate
Log in to AWS console and go to AWS Certificate Manager, click on Get started under Provision Certificates
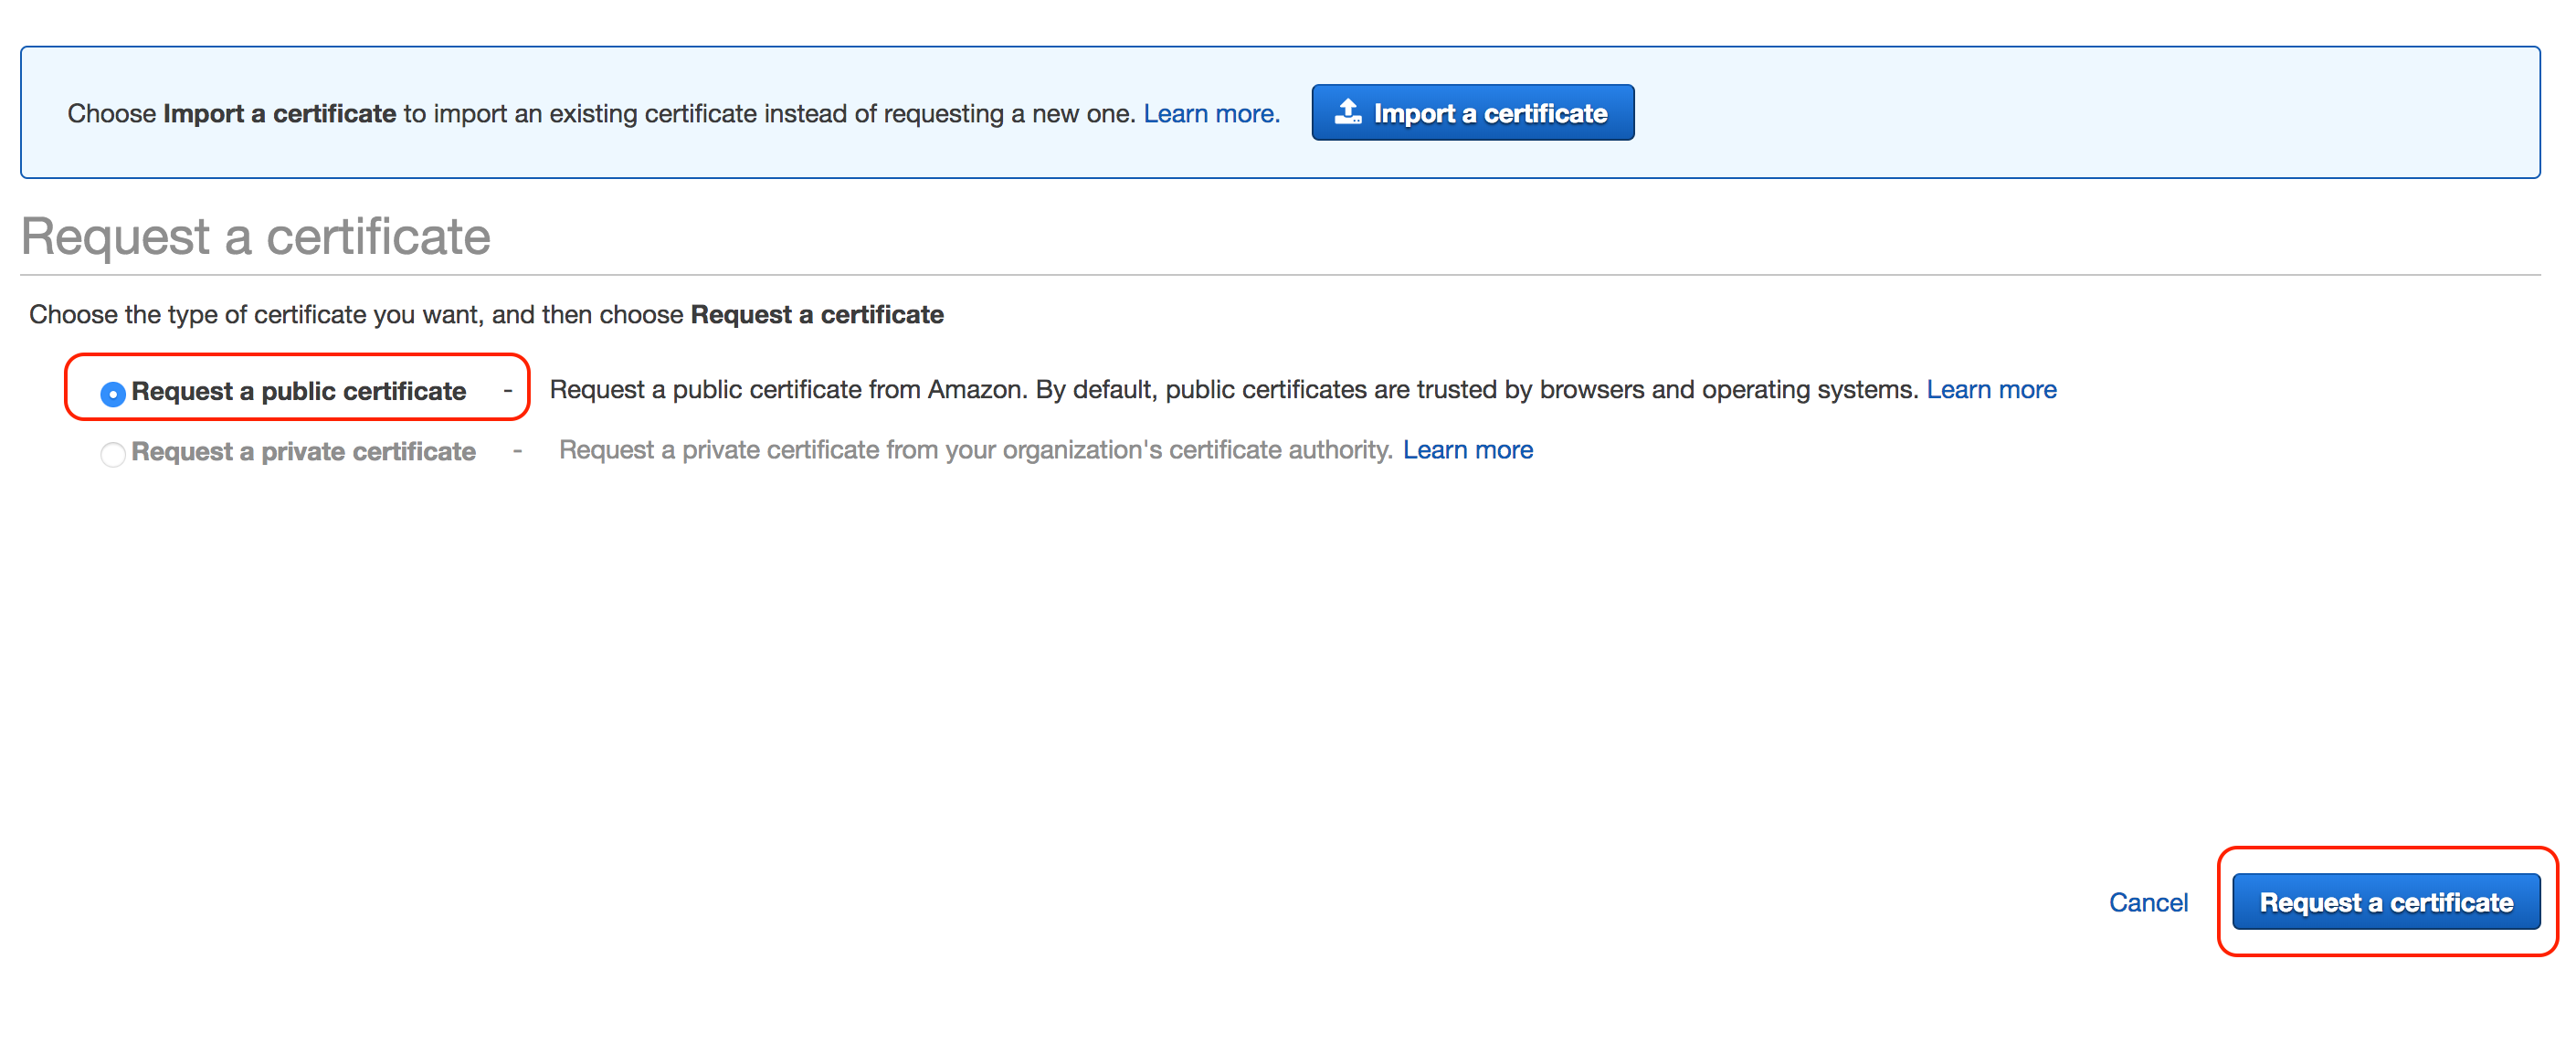
Select Request a public certificate and click Request a certificate
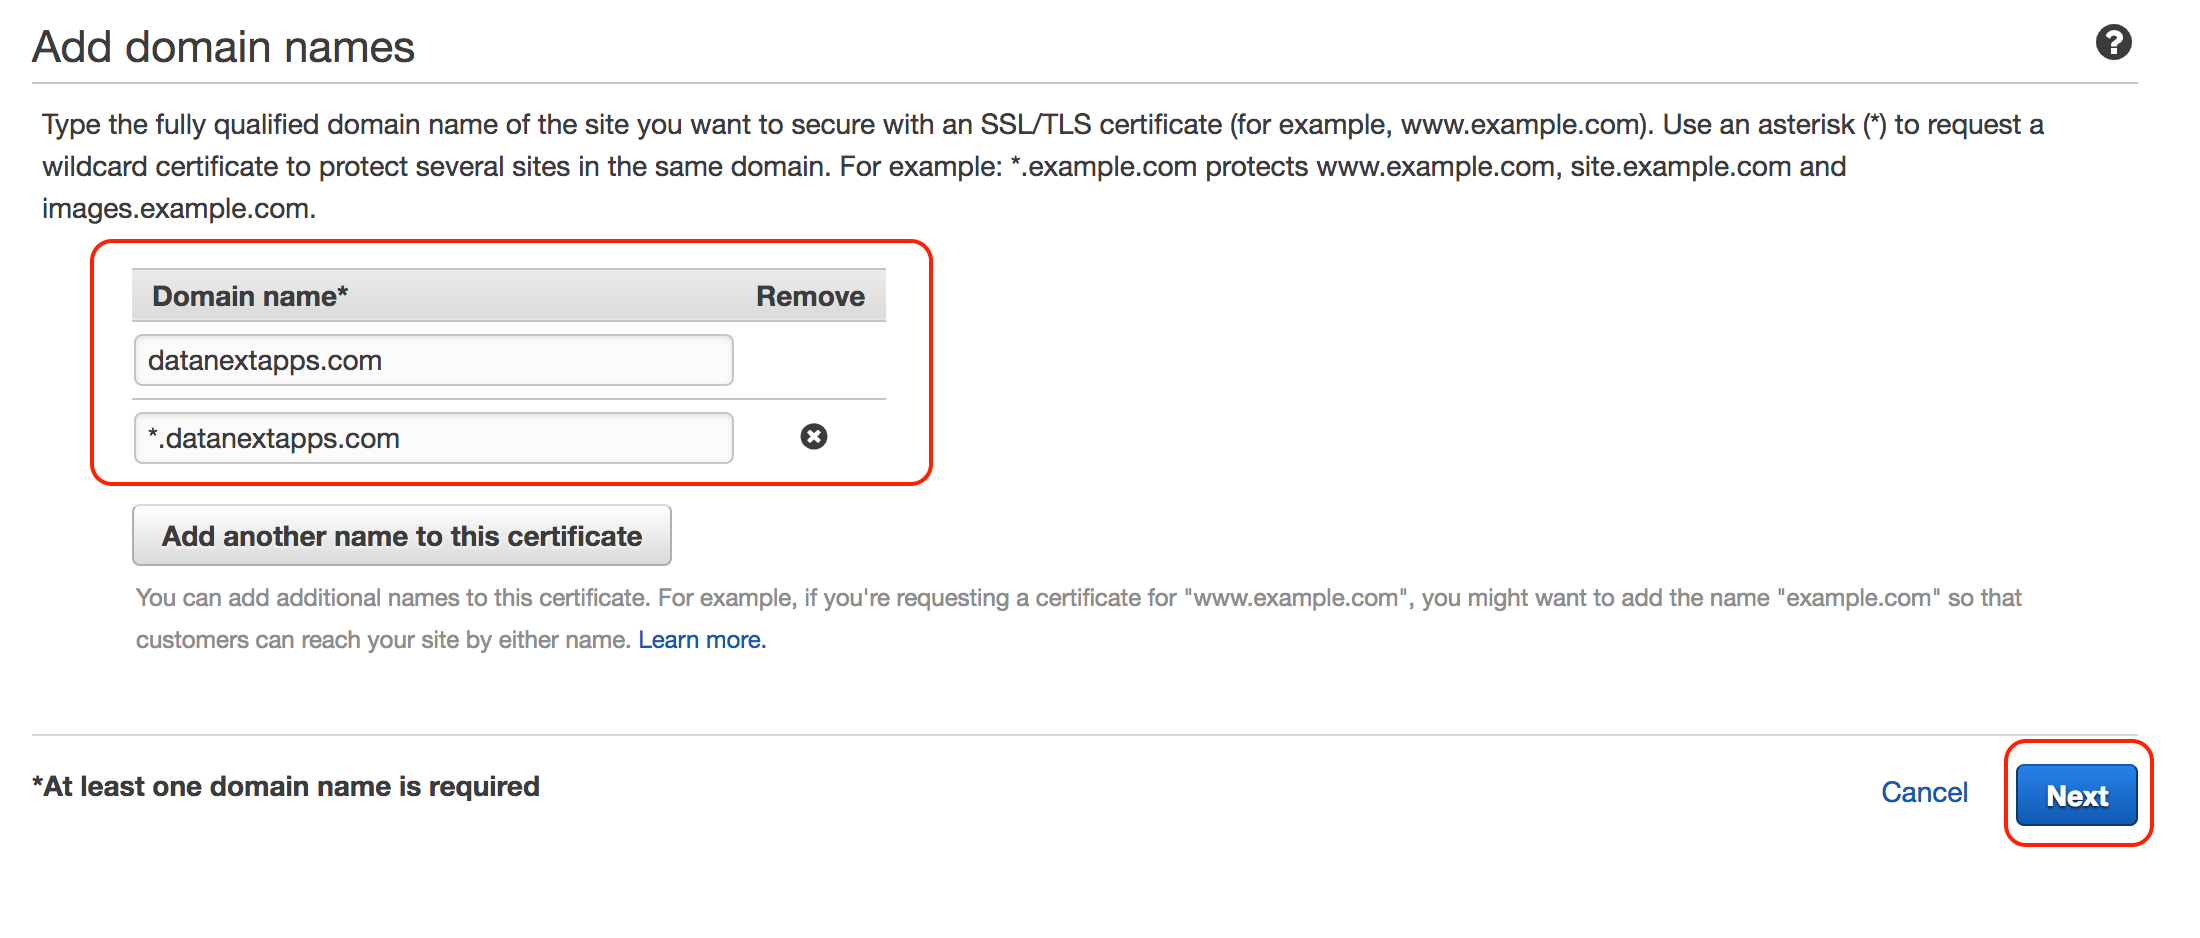
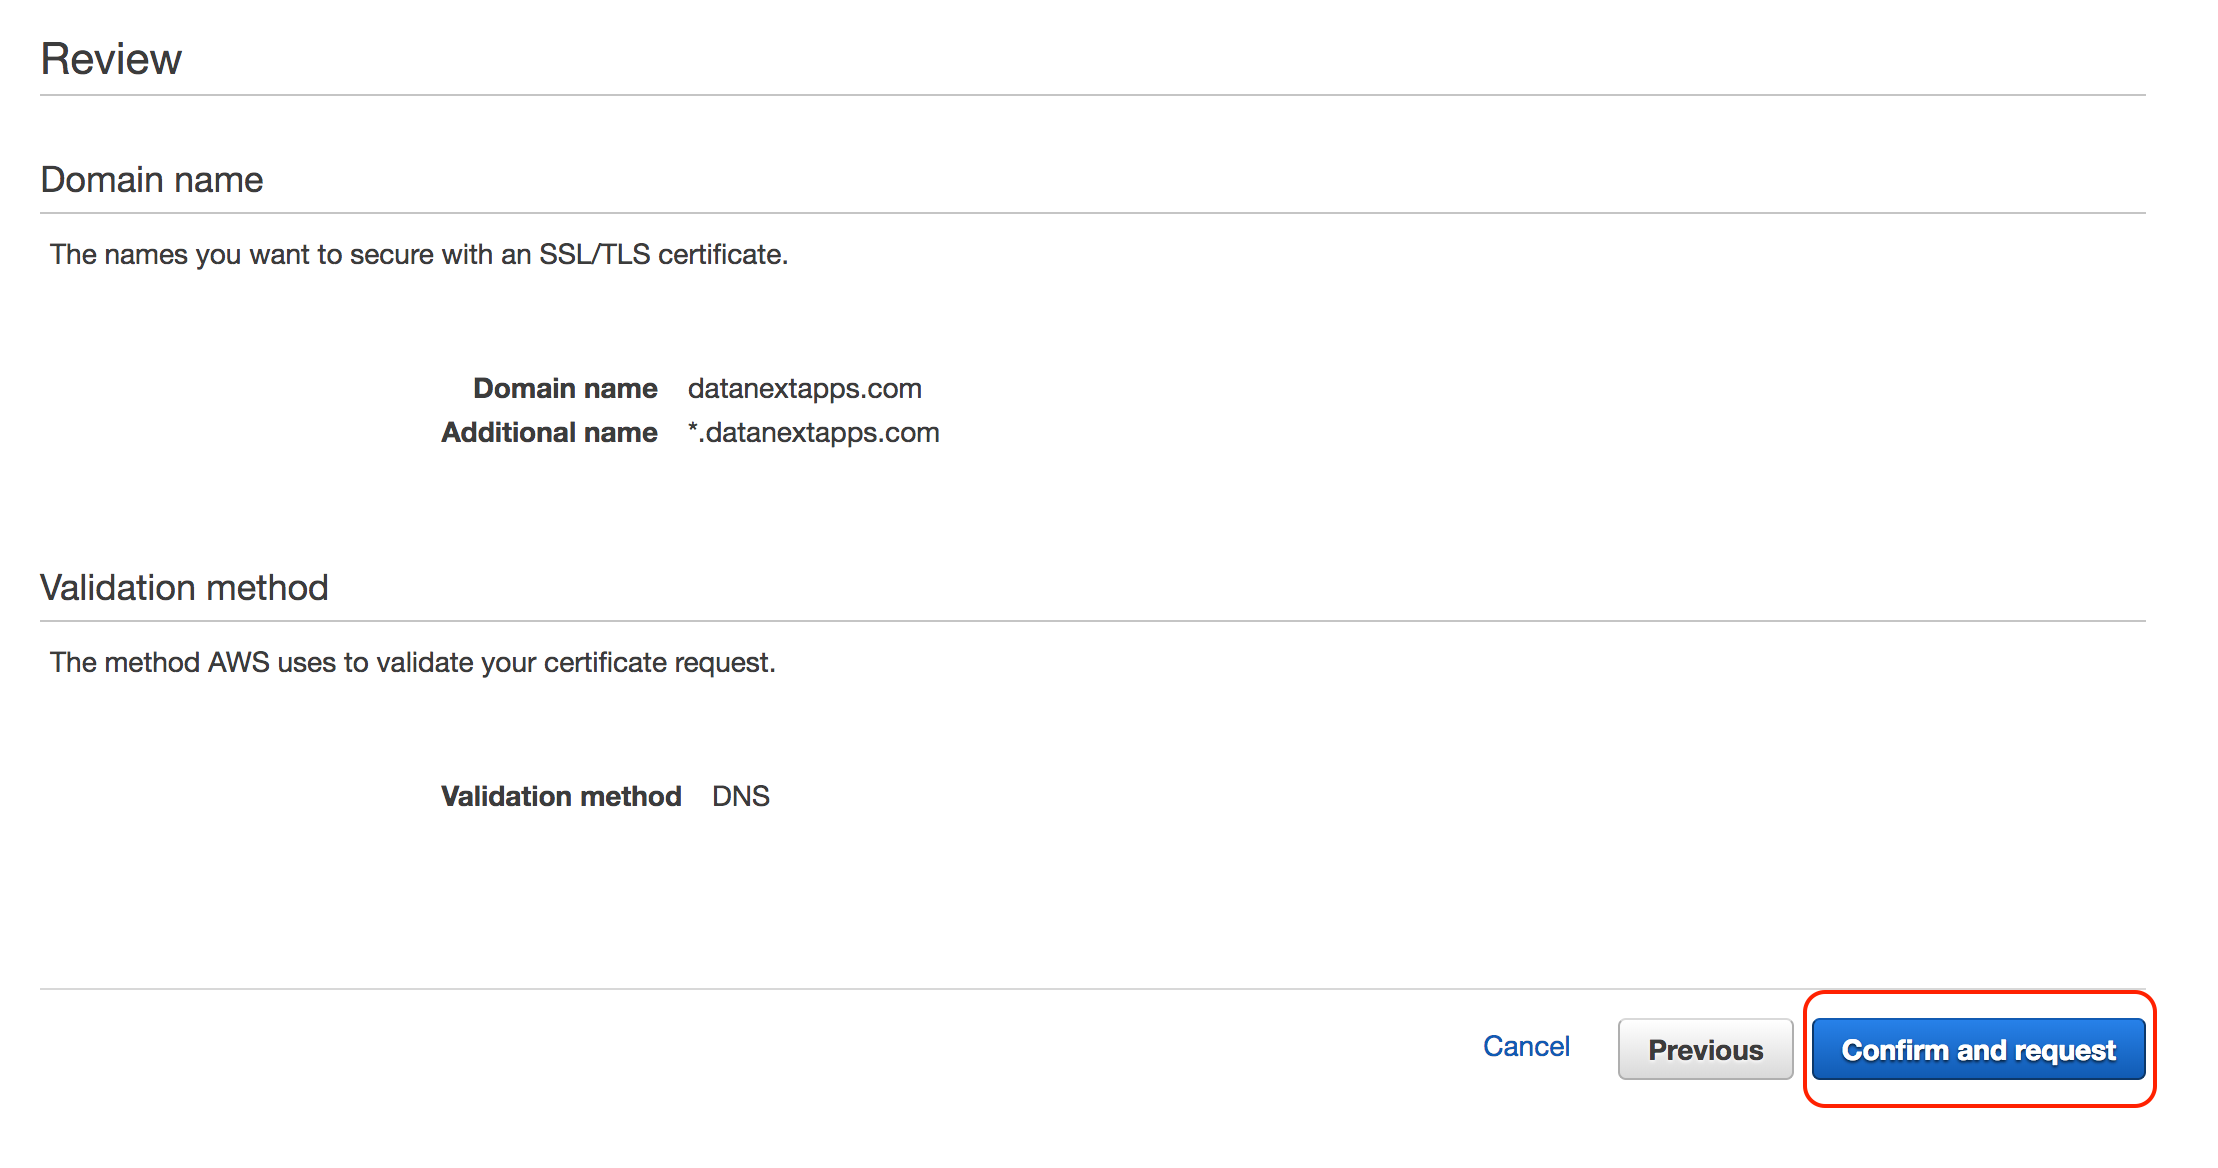
Enter domain names that you want to provision certificates for, we are doing our main domain including a wildcard
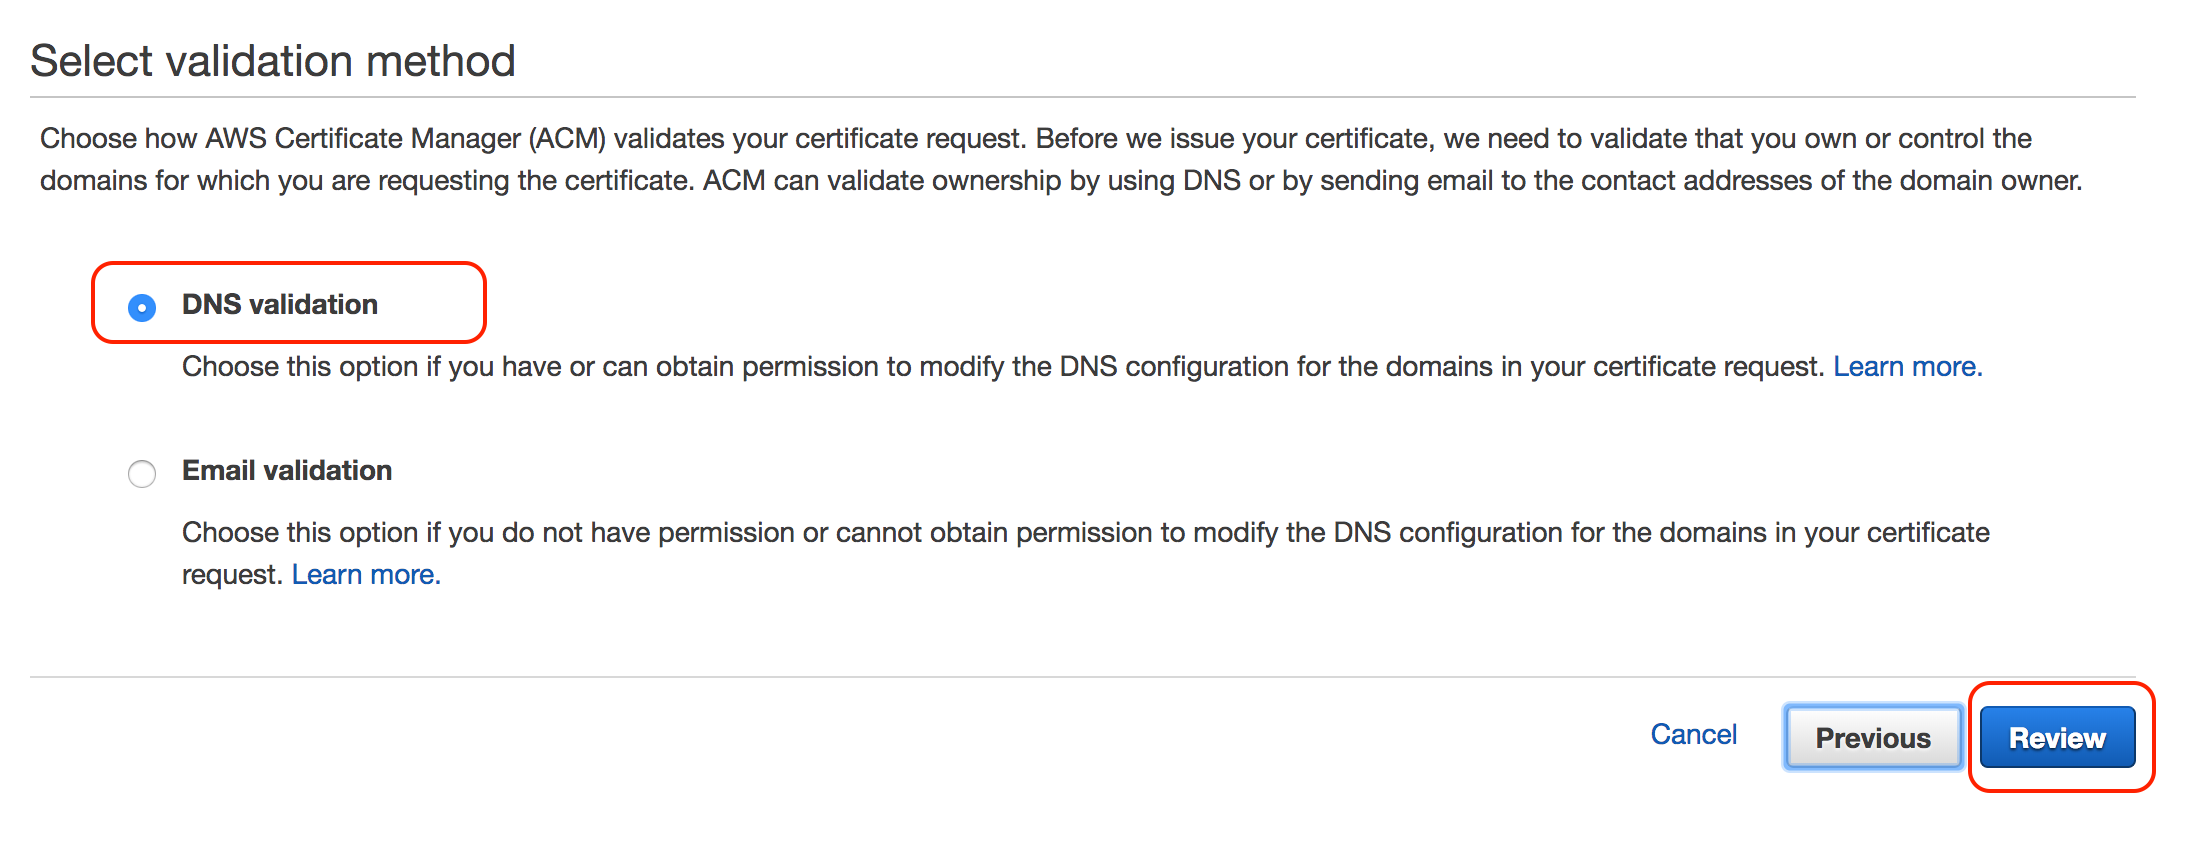
Next is to select a validation method, If you have access to DNS configuration then you need to validate access to the domain names that are part of the certificates. You can also select Email validation method, in our case we have access to our DNS configuration in Route 53 we selected DNS validation
Review the info and click Confirm and request
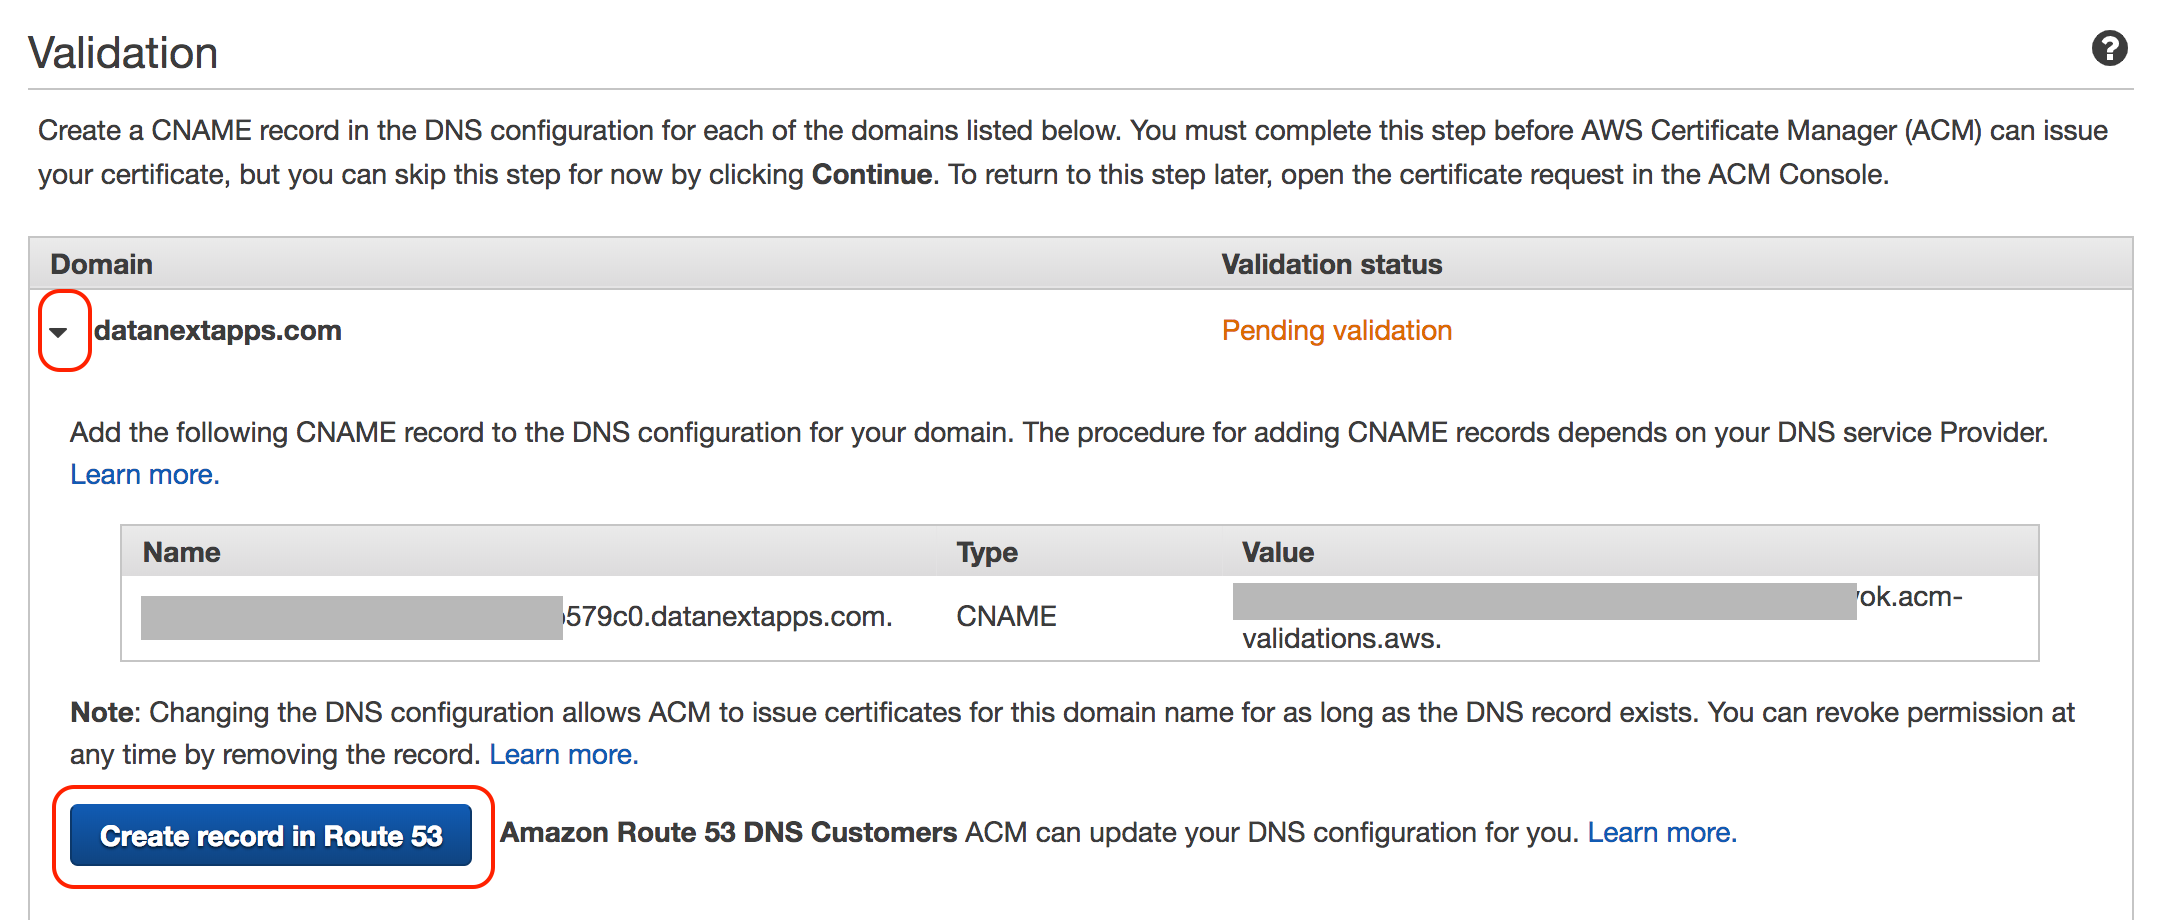
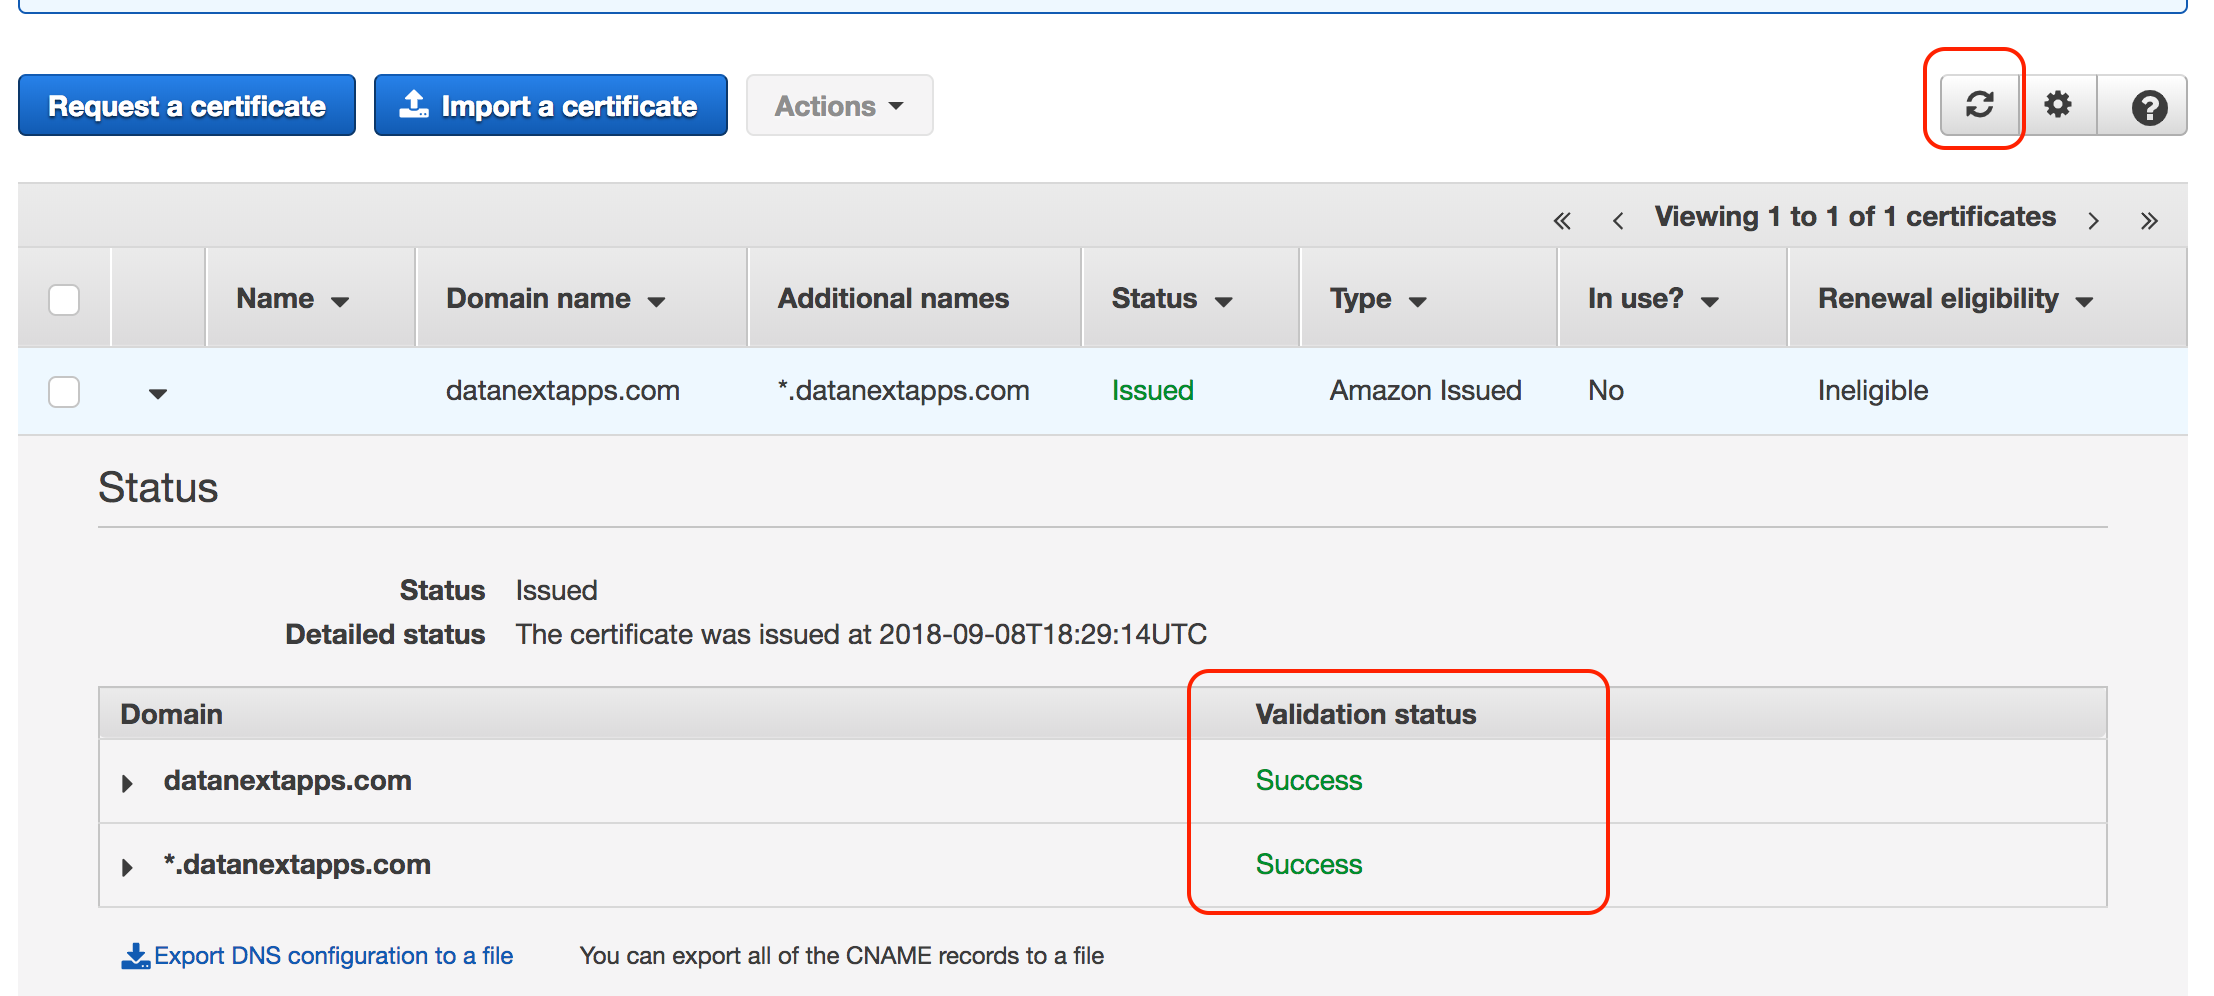
AWS will generate and issue the certificate, meanwhile, we need to validate the domain, expand the panel with the domain name
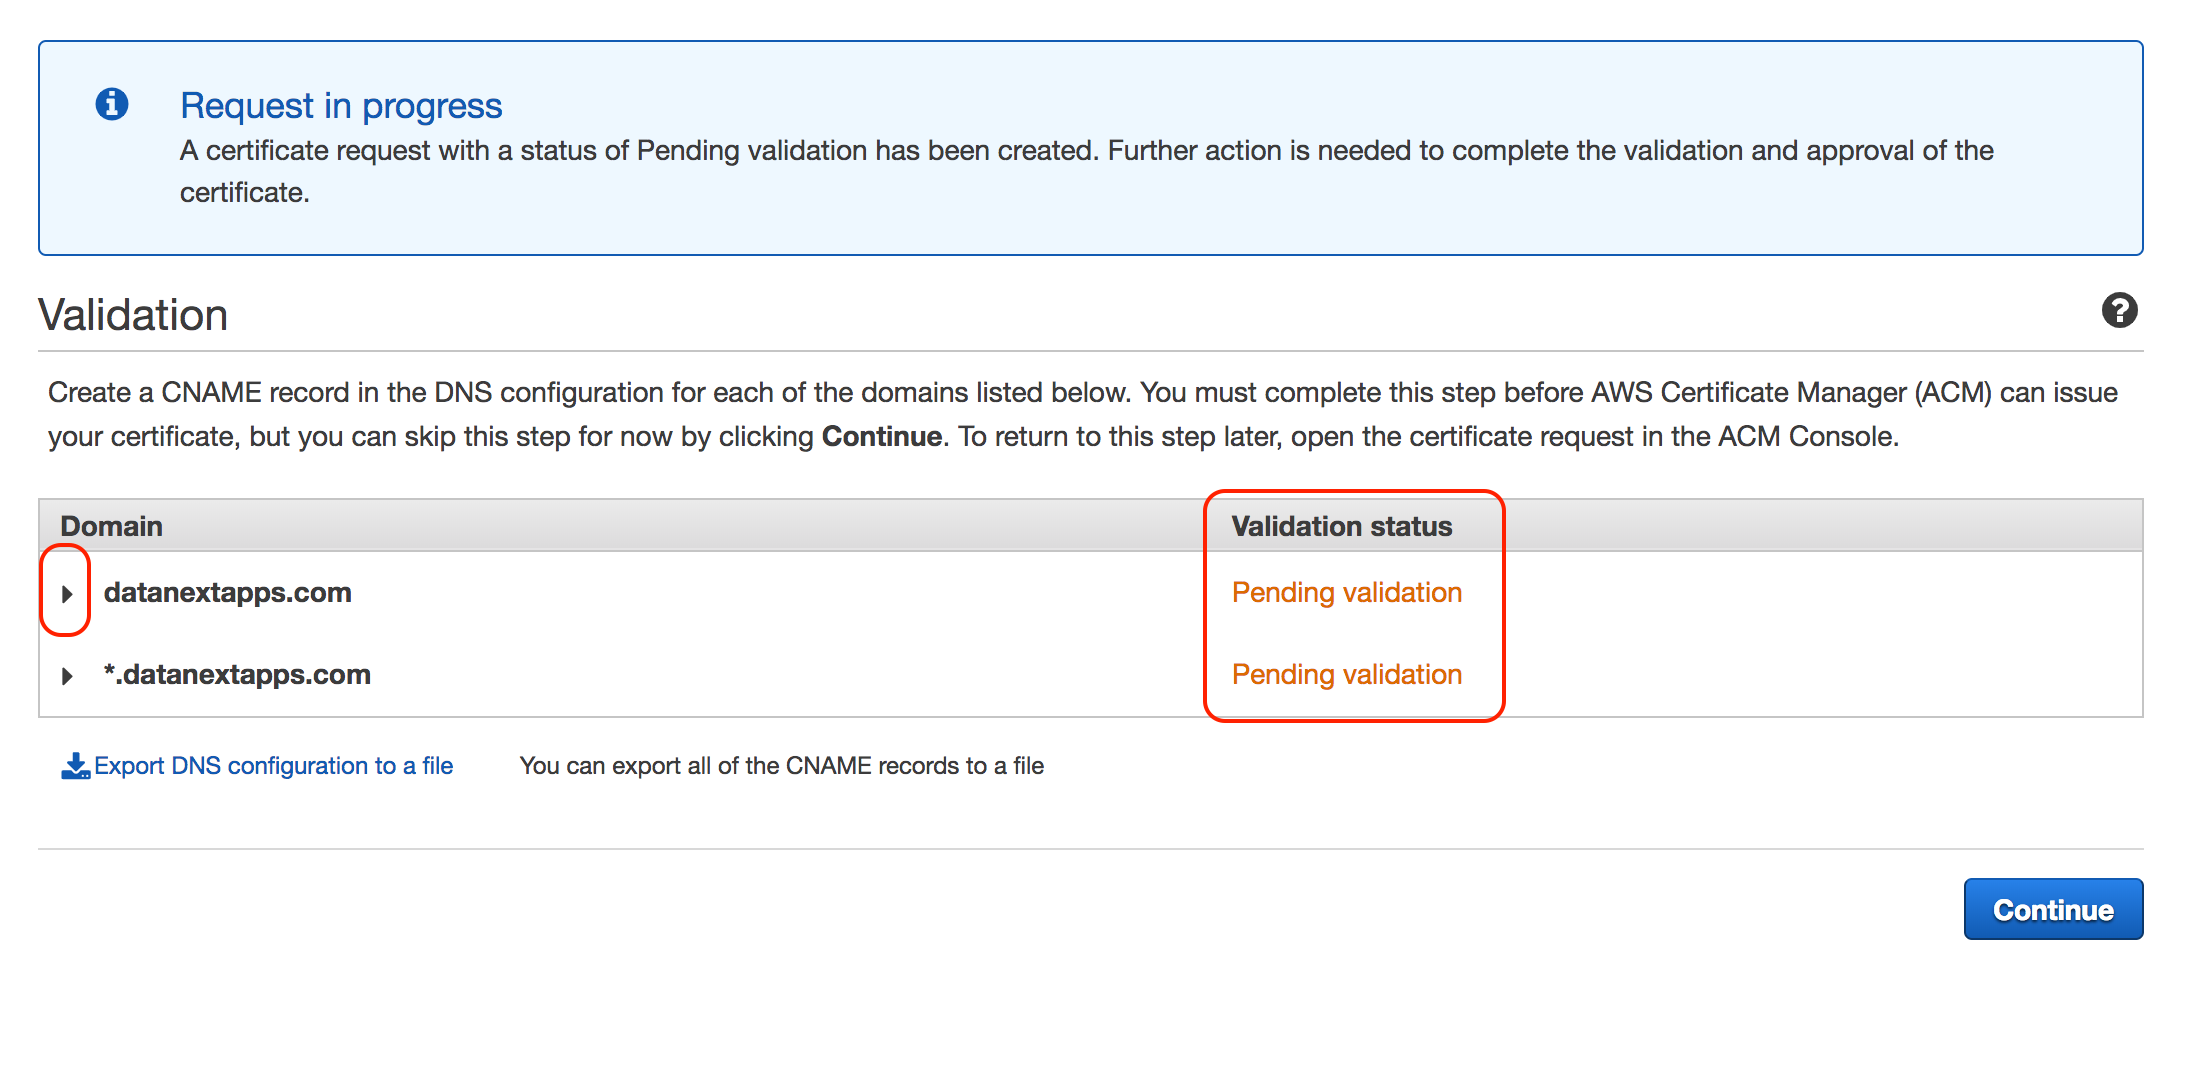
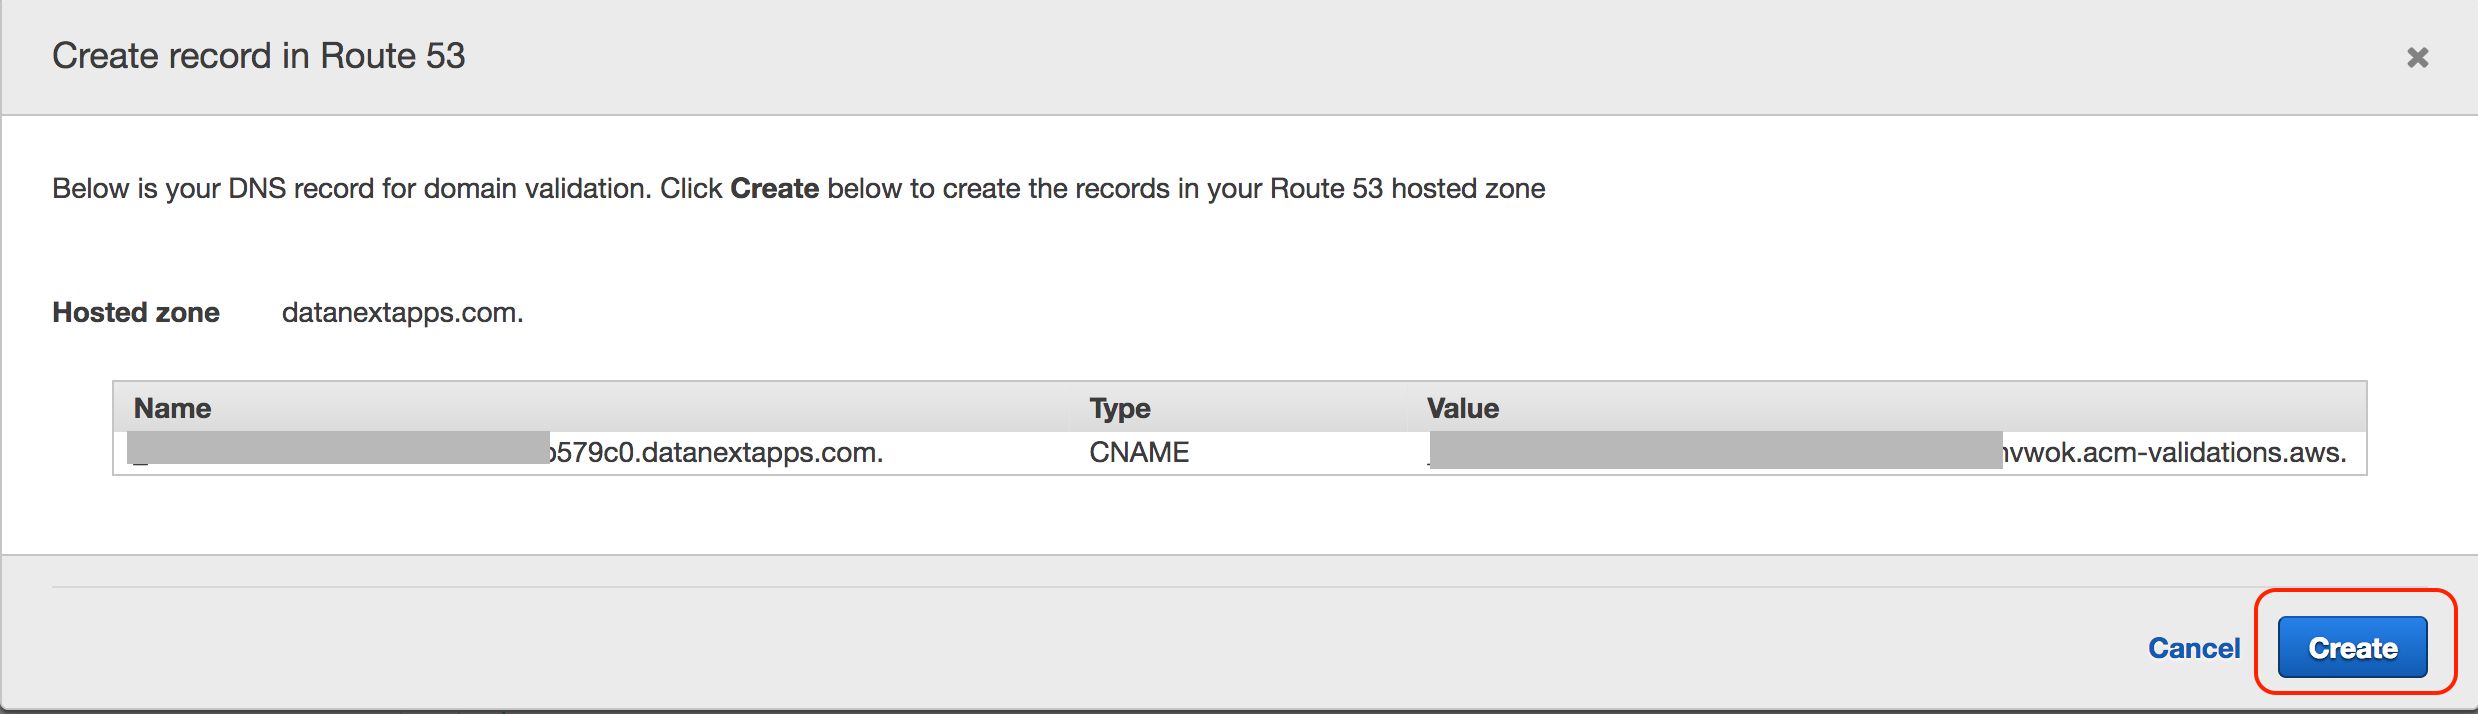
We need enter CNAME in our DNS configuration, If you are using Route 53 as your DNS management tool then AWS also provides an option to create a record directly from here, since we have our domain registered using Route 53 we can click the button Create record in Route 53
Click Create to create a record in Route 53
Once the record is created, click Refresh on and wait for Validation status to show Success
This completes generation of the certificate using AWS Certificate Manager (ACM)
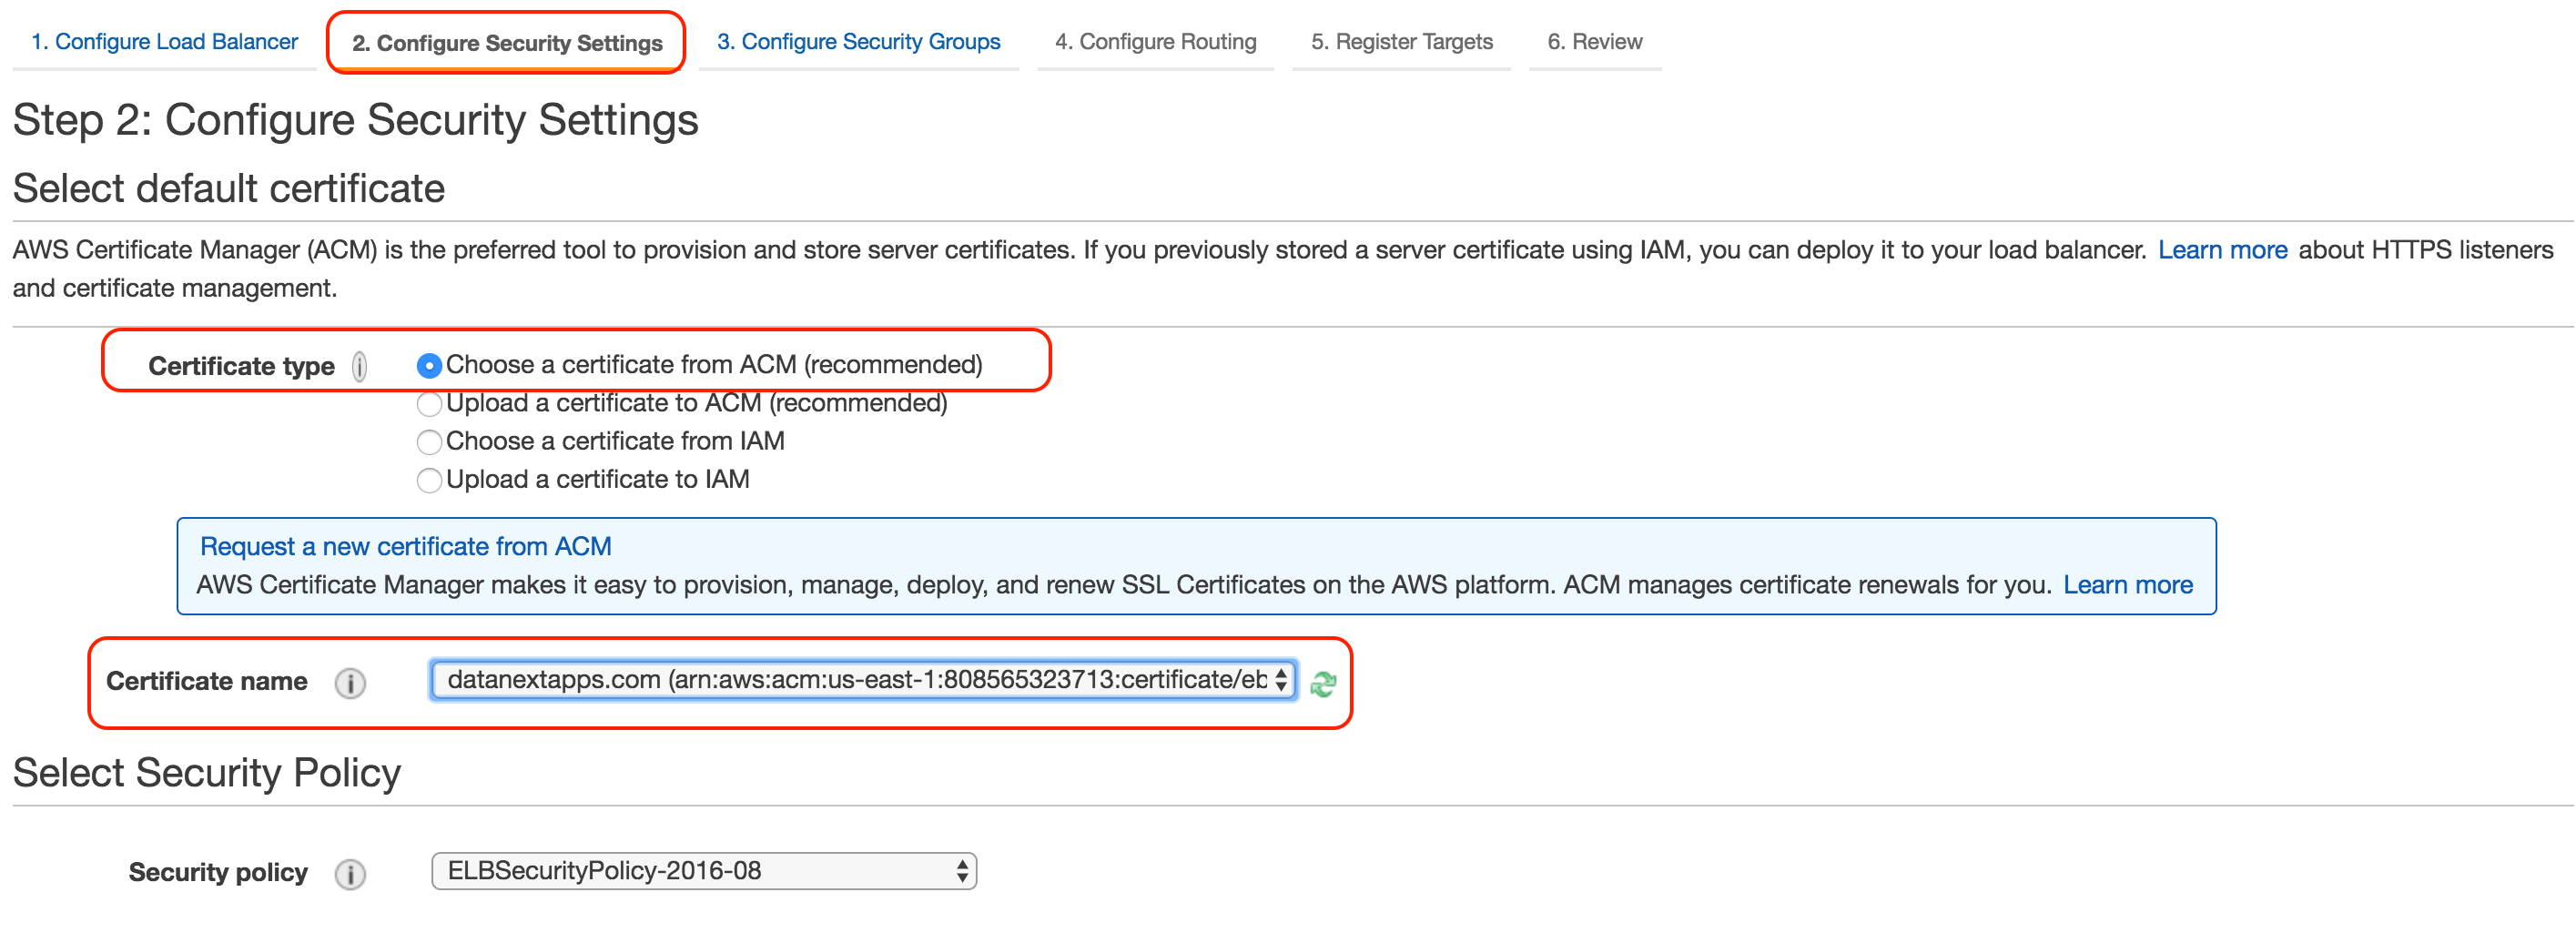
Associate SSL Certificate to Elastic Load Balancer
When creating new ELB you can choose the certificate during Configure Security Settings as shown in the slide
Configure Route 53
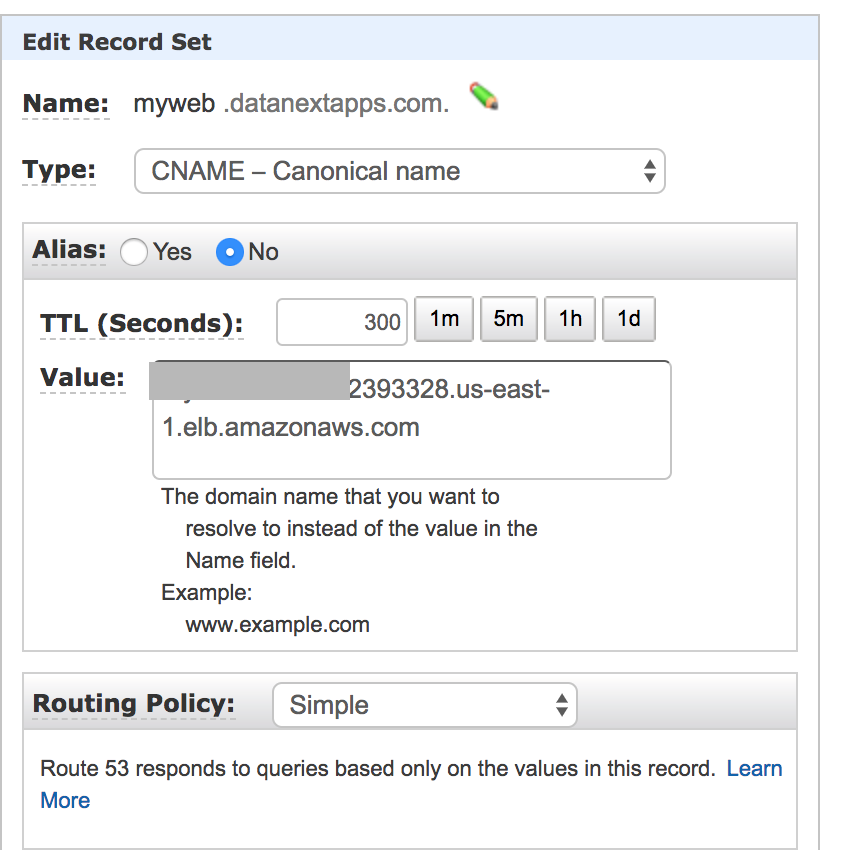
To complete our test we need to add a record in DNS configuration so our SSL certificate could validate the domain when accessing the application.
Copy the DNS name of ELB and go to Route 53 and create a CNAME record

Following is our CNAME entry in Route 53, we have created a Record set myweb.datanextapps.com to access our application
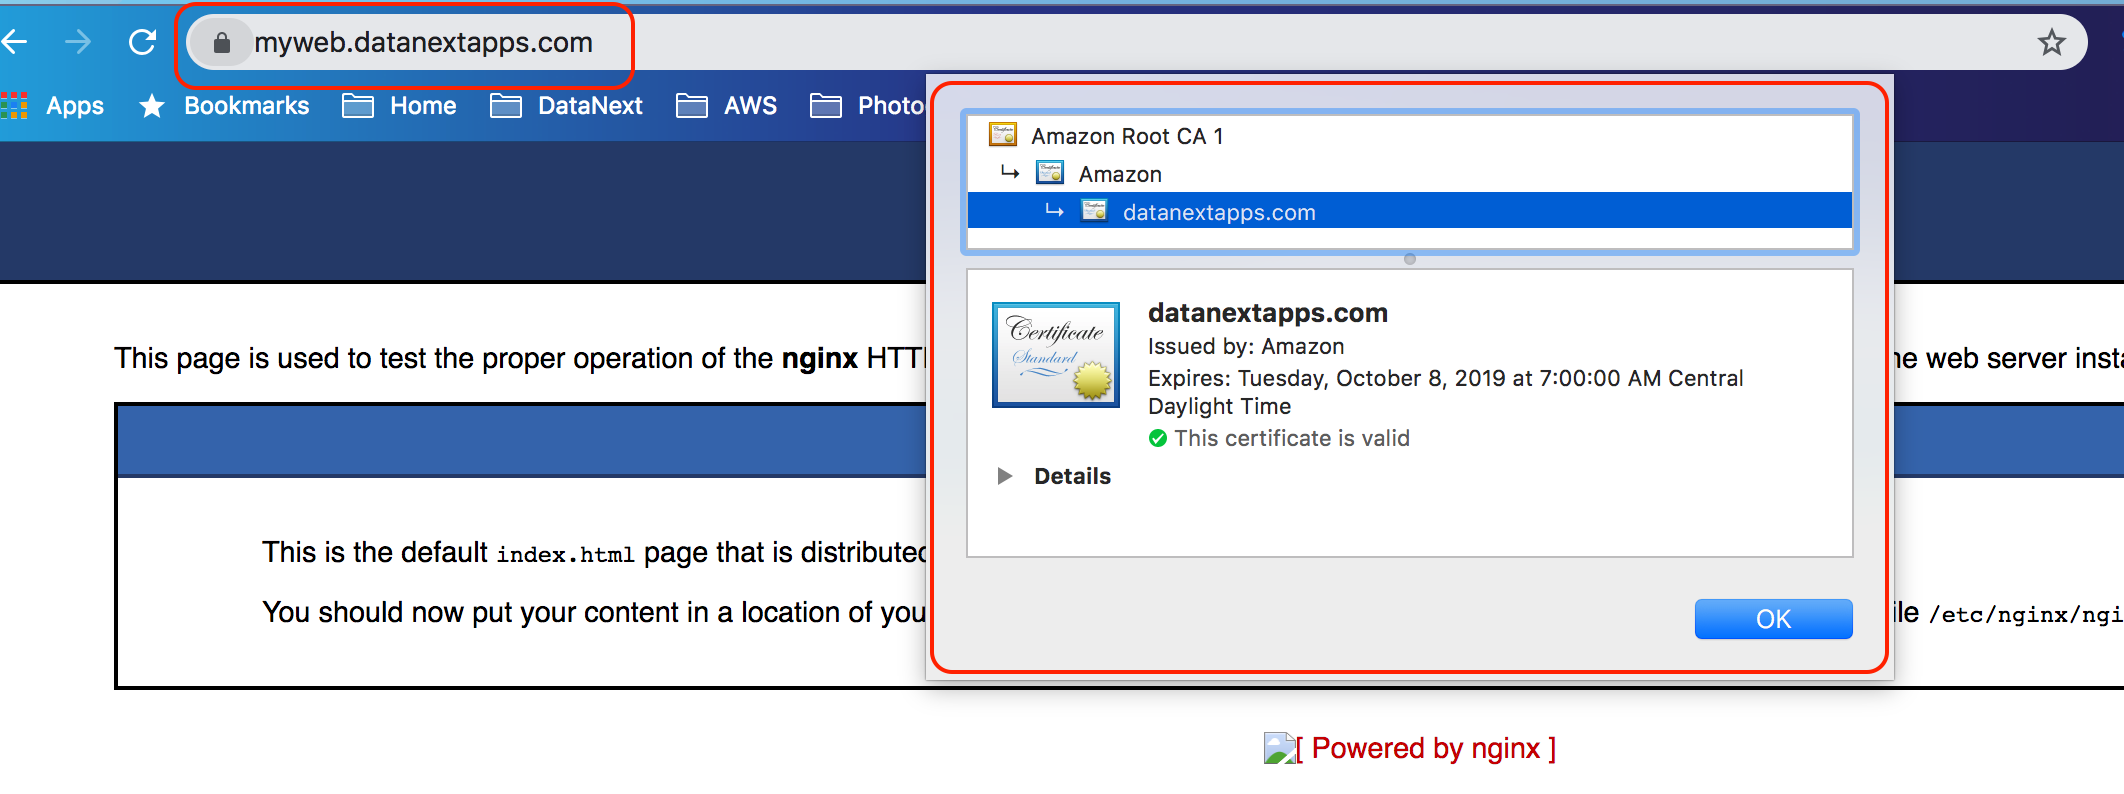
Testing the application
While accessing our application using myweb.datanextapps.com the request forward to our ELB which went to EC2 Instances running a basic NGINX without any SSL configuration.
You can validate the certificate in the browser
Hope you like this post, please leave a comment and let us know what topics you want us to cover.
Cheers,
Zeeshan Baig
About DataNext
DataNext Solutions is a US based system integrator, specialized in Cloud, Big Data, DevOps technologies. As a registered AWS partner, our services comprise any Cloud Migration, Cost optimization, Integration, Security and Managed Services. Click here and Book Free assessment call with our experts today or visit our website www.datanextsolutions.com for more info.